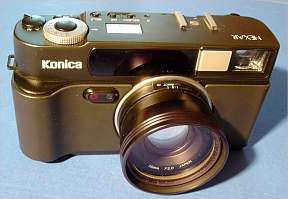
Specifications:
- film 35mm
- lens 35mm f 2.0 in 6 groups, 7
elements
- filter mount Ø46mm
- aperture f 2.0 to f 22
- focal adjustment 0.6m min. auto
or manual
- shutter speed from 30 s to 1/250
- code DX 25 to 5000 (manual 6 to
6400)
- light metering range EV -3 to EV
18 for 100 ISO
- compensation +/- 2EV with 1/3 steps
- 3 modes: P, A, manual
- flash socket, variable sync with
dedicated unit
- silent mode
- weight 500g with battery and film
|
|
-
- its pros:
- short shutter release delay
- excellent image
sharpness
- choice of aperture
- relying 1/250 shutter speed
|
 |
|
Preparation of the plug socket
- cut a plastic sheet 15x20mm 2 to 5mm thick
- cut 3 thin wires 50mm long
- use a bar of 3 female connectors, 2.54mm step
- solder the wires on the connector
- plug with araldite the plug on the socket
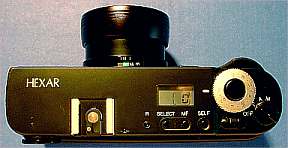
Prepare the camera
- remove the battery
- set the aperture on 2.0
- set the main switch on OFF
|
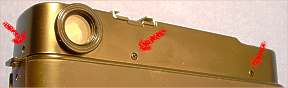
Dismount the cover
- withdraw the 5 screws on the top cover
- 2 screws are under the gores of the front sheath
|
|
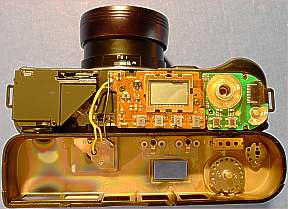
- draw the cover upwards, and turn it on the back
- mark and un-solder the 3 wires from the flash socket
|
|
|
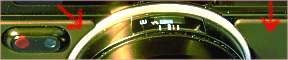
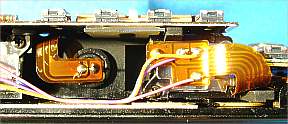
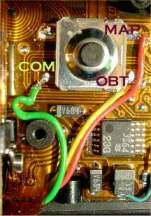
Install the plug socket
- move upwards the wires connecting the distance metering
system
- withdraw the double face adhesive tape
- stick with araldite the socket, taking care of its alignment,
0.5mm away from the lower edge (check the step inside of
the cover)
- Put the glue only on the chromed part
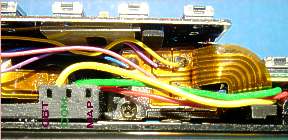
COM earth wire
MAP exposure and distance preset
OBT shutter release |
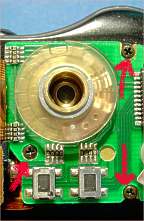
Connexion
- withdraw the 3 screws on the selecting circuit board
- swivel the board on the side
- run the wires to the shutter switch
- solder the wires on the shutter switch (use a 15W soldering
iron)
- turn back the circuit board
- put back the 3 screws
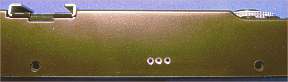
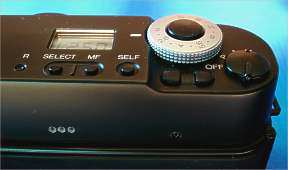
Cover
- mark the plug location: take a transparent plastic sheet
80x10mm, put it on the plug, perforate it at the cover screws
places, set the screws, perforate the plastic sheet at the
plug holes, remove it and place it on the cover with the
screws.
- markon the cover the location of the plug holes
- drill the 3 holes
|
|
|
Remounting
- solder the wires on the flash socket
- check the positions of the main switch and of the aperture
button
- set the flash wires
- put back the cover which must fit easily
- put back the screws
- install the battery
|
|
|
Hints for
Kap use:
- set the P mode
- set the aperture on 2.0
- set the distance manually on 999
|
|
When using
the P mode, the camera first adjust the shutter speed to the
selected aperture. If there is too much light, it then adjust
the proper aperture at the maximum shutter speed.
When pre-setting the distance, the shutter
release delay is less than 0.3 seconds. |