- The cradle has several functions:
- - mechanical fitting on the pole
- - bearing the camera
- - tilt the camera
- - set the frame, landscape or
portrait
-
- The cradle here described is the one made end of 2009.
- The camera seating has a mini servo for the zoom command
of the camera.
|
|
 |
Tube Fitting
The external diameter of the tip
of my poles is 9mm . It is the smallest diameter that can
be used for two reasons:
- mechanically, the limit for
a 600g cradle is 7mm
- 8 mm inside diameter is the
minimum for the link cable to go through.
The tip section, as the whole pole,
have a conical shape. Fittings that could locally smashed
the tip must be avoided . I decided to make a fitting from
a tube that would fit the conical shape.
This is a put-over fitting; easy
to install, easy to remove..
-
Tip of the top end section covered
before coating
|
|
Here is the tip fitting make:
¤ The fitting is an aluminum
pipe Ø12-10mm about 200mm long which ends are carefully
smoothed.
¤ The tip of the top section
is covered on 15 cm with thin polyethylene film (such as
those given when shopping) which is set in 2 or 3 layers
around the tip.
Excess of film is plugged in the
top hole.
¤ 10 cm of the surface of
the film is pasted with epoxy glue. 5cm inside the aluminum
pipe is also pasted.
¤ The pipe is set over the
tip as far as possible.
¤ Let the glue harden and
then release the pipe from the tip. Remove all polyethylene
film.
¤ Try again to set the pipe
on the tip. There is now a perfect put-over fitting, When
pressed enough, it does not rotate.
|
Tilt
Tilt is important for centering
pictures. Lean the pole is not practicable. First it's loosing
elevation, second the pole is bowing and it is almost impossible
to get it steady.
-
On the pole, only 90° angular
range is necessary, so the RC could be used. In fact, I
found easier to wire the command so the electronic board
and the potentiometer are removed.
-
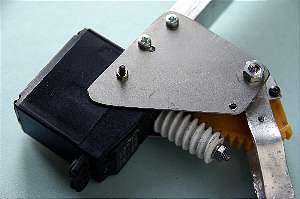
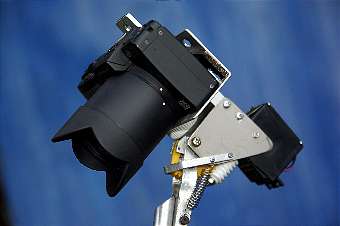
On this pic of my cradle built
end of 2009, the servo is a HES 188 which has metal bushings
and let the cog-wheel axle Ø3mm running completely
through the last gear.
|
|
-
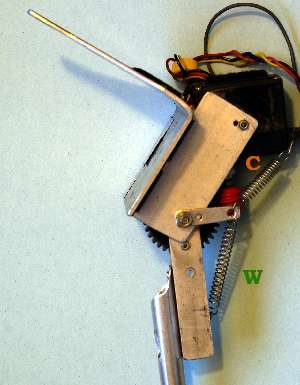
On this picture of another
cradle, the spring C is for the cog and the
spring W is for the weight offset.
Note that the tilt is such that
it brings the camera outside the pole axis. This let shot
pictures until the pole and the bearer. However, it sets
off the weight of the camera and it needs a spring to compensate
and to ease the action of the servo.
|
-
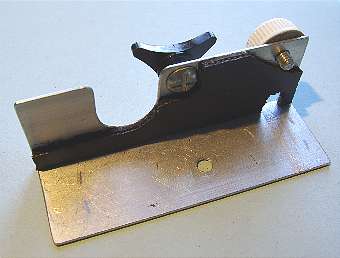
- Camera seating
-
- Because it sometimes need to change picture frame from
landscape to portrait, the seating is designed for easily
do it. The camera seating is mounted on the vertical part
of the rotating assembly.
-
- This camera seating is also easy to change for another
one that fits another camera.
-
- Note the nut for mounting the camera which is screwed
aside as not to lost it.
|
-
|
-
|
-
|
-
|
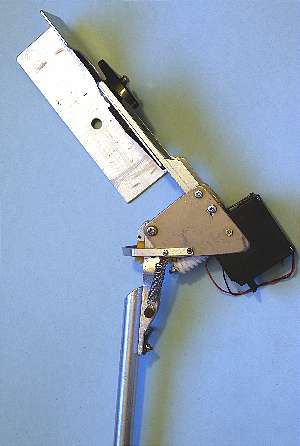
- The mechanical assembly of the cradle is now
complete. The camera support is shown as portrait setting.
- It weights 160g.
- The tilt angle ranges from +15° upward to -70°
downward.
-
- The spring seen here is for the weight compensation.
Torsional springs for the cog-wheel are hidden on this picture.
|